-
By

- January 19, 2025
- Displays & Fixtures
Craft Market Table Display: A Complete Checklist for New Vendors
Just like many of you, crafting has been a long time hobby in my life, so it didn’t come as a surprise that one day I’d want to share my work with others by selling my products at Craft Fairs. Craft fairs are a fantastic opportunity to showcase your creativity and connect with customers who appreciate handmade goods. But, let’s face it—setting up your craft market table display can be daunting, especially if you’re NEW to the game! I know when I first started it was a bit ‘trial and error’ and just figuring things out week-in and week-out at various Craft Shows. In this guide, I’ll try to cover everything you need to make your first craft fair a success, from must-have tables to lighting hacks that highlight your products beautifully. So if you’re ready to tackle this, so am I!
Why Your Craft Market Table Display Matters
First off, you have to understand that when you’re at a Craft Fair, you are essentially competing with other talented vendors, making it essential for your booth to stand out. Your display is not just a way to showcase your products; it’s also an important marketing tool that represents your brand and attracts potential buyers. Here’s why your craft fair display is so important:
1. First Impressions Matter
- In a crowded craft fair, customers make snap judgments about which booths to visit. There’s a lot of ‘eye-candy’ at Craft Fairs. Lots of booths and lots of products. Be the ‘eye candy’ that pops!
- A well-organized, visually appealing display immediately signals professionalism and quality.
- According to a study by RetailNext, 65% of shoppers are influenced by store design and visual merchandising.
2. Builds Trust with Customers
- An eye-catching display shows customers you’ve put effort into your booth, making them more likely to trust the quality and craftsmanship of your products as well as the seriousness of your business.
- Consistent branding across your booth—like cohesive colors, signage, and props—reinforces your identity and also builds credibility.
3. Drives Sales
- Strategically-placed displays encourage customers to interact with your products, increasing the chances of purchase.
- Well-lit, accessible arrangements can help highlight the products you really want to push, driving attention where it matters most.
4. Standout Examples for Inspiration
To help you envision a standout craft market table display, here’s a simple comparison:
| Booth Type | Features | Customer Reaction |
| Cluttered Booth | Products scattered, no clear signage, poor lighting | Customers walk past, feeling overwhelmed |
| Organized Booth | Tiered displays, branded signage, well-lit products | Customers stop, engage, and ask questions |
Tables and Table Covers: The Foundation of Your Display
Your table is the backbone of your craft booth. It serves as the primary platform for displaying your products and sets the stage for your overall presentation. Choosing the right table and table covers is more important than you might think for the success of your overall display.
1. Choosing Sturdy, Portable Tables
- Look for foldable, lightweight tables that are easy to transport and set up.
- Consider table dimensions that match your booth space, typically 6-foot or 8-foot tables for standard craft fairs.
- Adjustable-height tables can add flexibility, helping you create varied display levels.
2. Tablecloth Materials: Lightweight vs. Heavy-Duty Options
Table covers play a huge role in setting the tone for your display. When I first started, I cobbled together all manner of table coverings, not putting too much thought into what covered my tables. After many shows and a lot of casual observation, here are a few tips for selecting the right material:
- Lightweight Tablecloths:
- Easy to pack and transport.
- Best for indoor events where durability isn’t a concern.
- Heavy-Duty Tablecloths:
- Ideal for outdoor fairs due to their resistance to wind and stains.
- Adds a polished, professional look.
- Popular Material Choices:
- Cotton: Soft, natural aesthetic but prone to wrinkles.
- Vinyl: Waterproof and easy to clean for outdoor fairs.
- Polyester: Wrinkle-resistant, durable.
3. Tips for Color Coordination
A cohesive color scheme helps make your booth visually appealing and reinforces your business brand. Plus the right colors can help tie together the entirety of the look and feel of your booth.
- Use neutral tablecloths (white, black, or gray) to let products pop.
- Bright or patterned tablecloths can add personality, but be cautious not to distract from your products.
- Match table covers with your logo colors to create consistency in your branding.
4. Pro Tips for Table Setup
- Use Clips or Weights: Keep tablecloths secure, especially for outdoor events with wind.
- Add Levels: Use risers, crates, or small shelves to create height and make displays more dynamic.
- Leave Space for Transactions: Ensure part of your table is free for a payment area and bagging products.
A sturdy table with a thoughtfully chosen cover is more than just a necessity—it’s a canvas for showcasing your products in the best light. With the right foundation, your booth will not only attract attention but also invite customers to stay, browse, and most importantly buy!
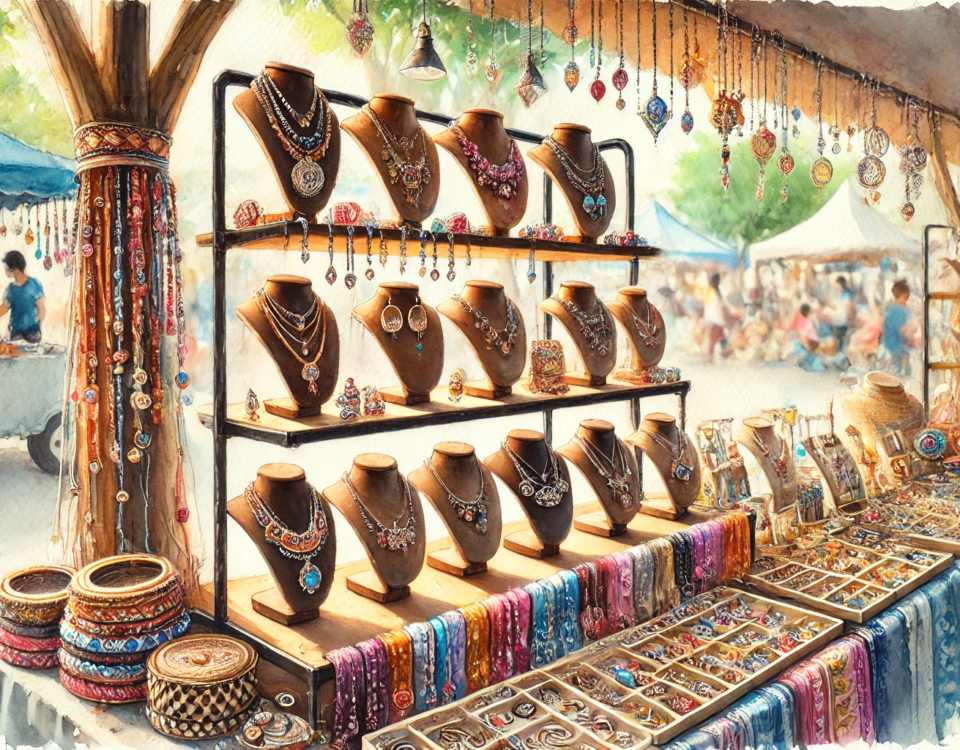
Shelving and Racks for Optimal Product Visibility
While tables provide the foundation, shelving and racks can help elevate your craft market table display—literally and figuratively. By creating vertical space, you can showcase more products, make your booth more dynamic, and keep everything organized. And this especially comes in handy when dealing with a more confined booth space.
1. Types of Shelving for your Craft Market Table Display
Investing in the right shelving can transform your booth. Here are some of the more popular options you should consider:
- Collapsible Shelves:
- Lightweight and easy to transport.
- Perfect for vendors with limited storage or setup time.
- Tiered Shelves:
- Maximize vertical space while keeping products accessible.
- Ideal for small items like candles, jewelry, or soaps.
- Custom Shelving:
- Made to fit your products and branding style.
- Higher upfront cost but can provide a more polished, professional look.
| Shelving | Benefits | Best For |
| Collapsible Shelves | Easy to transport and store | Limited booth spaces |
| Tiered Shelves | Showcases multiple levels | Small, lightweight items |
| Custom Shelving | Tailored to products, unique appeal | Brand-focused displays |
2. How to Use Racks for Hanging Items
Racks are a must-have for showcasing products like clothing, artwork, wreaths or bags. They make it easy for customers to browse and interact with your items.
- Portable Clothing Racks:
- Perfect for garments like T-shirts, scarves, or aprons.
- Look for models with wheels for easy transport.
- Wall-Mounted Racks:
- Use for hanging prints, posters, or small bags.
- Ideal for compact booth setups where floor space is limited.
- Pegboards:
- A versatile solution for hanging items like jewelry or tools.
- Add hooks or clips for customizable layouts.
- Rack Shopping Tips:
- Opt for foldable designs to save space during transport.
- Choose sturdy materials (metal or reinforced plastic but I’ve had the best experience with metal).
3. DIY vs. Pre-Made Shelving and Racks
- DIY Shelving and Racks:
- Cost-effective and customizable.
- Requires time and effort but adds a personal, handmade touch.
- Pre-Made Shelving and Racks:
- Quick and easy to set up.
- A professional finish, though it may lack personalization.
| Option | Cost Estimate | Key Features |
| DIY Shelving | $20–$50 per unit | Customizable, fits unique products |
| Pre-Made | $50–$150 per unit | Ready-to-use, polished look |
4. Tips for Arranging Shelving and Racks
- Group Similar Items Together: Make it easier for customers to find what they’re looking for.
- Create Visual Flow: Use taller shelves at the back and lower ones at the front to draw the eye upward.
- Add Lighting: Highlight items on upper shelves with small LED lights if in a covered booth or space where more light would make sense.
- Leave Walkways: Avoid overcrowding your booth by keeping pathways clear for easy browsing.
By incorporating shelving and racks into your craft market table display, you’ll not only make your products more visible but also create an inviting, professional space. Remember, vertical space is your best friend when it comes to craft fair displays!
Signage and Branding Essentials
Your craft market table display is more than just a place to sell products—it’s a reflection of your brand. Having good signage and branding are great for attracting customers, building recognition, and even leaving a lasting impression, which can be extremely valuable for later Craft Fairs you may participate in. Let’s explore how to make your booth unforgettable.
1. Crafting a Standout Booth Sign
Your booth sign is often the first thing customers notice. Make sure it’s eye-catching, clear, and professional. A little creativity can help differentiate your booth as well!
Key Elements of a Great Booth Sign:
- Your Brand Name: Use large, legible fonts that reflect your branding style.
- Logo Placement: Include your logo for instant recognition.
- Tagline: Add a short tagline that tells customers what you sell (e.g., “Handmade Jewelry with a Story”).
- High-Quality Materials: Use durable materials like vinyl, wood, or acrylic for a polished look.
2. Business Cards, Flyers, and QR Codes
Even after the fair, you want customers to remember you. These small details can keep your business top-of-mind:
- Business Cards:
- Include your name, logo, contact details, and website.
- Use a clean, minimalistic design that matches your brand colors.
- Flyers:
- Perfect for promoting special offers, upcoming fairs, or new collections.
- QR Codes:
- Link to your website, social media, or online store.
- Place them visibly on your table or signage for easy scanning.
3. Portable Banners and Their Impact
Banners can take your booth to the next level by improving visibility and drawing customers in from a distance.
- Roll-Up Banners:
- Great for displaying product highlights, promotions, or your brand story.
- Easy to transport and set up.
- Hanging Banners:
- Perfect for outdoor fairs, providing visibility above head level.
- Use lightweight fabric or vinyl for durability.
- Banner Design Checklist:
- Use high-resolution images of your products.
- Incorporate your logo, brand colors, and website.
- Keep text minimal for quick readability.
By incorporating well-designed signage, you’ll create a memorable booth that captures attention and communicates professionalism. Don’t underestimate the power of a great sign—it might just be what makes customers stop and take notice of your booth!
Lighting Tips to Make Your Products Shine
Good lighting can make or break your craft market table display. Proper illumination not only highlights the details of your products but also creates an inviting atmosphere that draws customers in. Let’s explore how to use lighting effectively for your display.
1. Why Lighting Matters
- Attract Attention: Bright, well-lit booths stand out in crowded craft fairs.
- Enhance Product Appeal: Proper lighting highlights textures, colors, and intricate details, especially for items like jewelry, artwork, or textiles.
- Set the Mood: Warm, soft lighting creates a welcoming vibe, while brighter lights feel modern and clean.
2. Types of Lighting for Craft Booths
Different lighting options serve different purposes. Choose the ones that best fit your booth setup:
Battery-Powered LED Lights
- Benefits: Portable, energy-efficient, and cost-effective.
- Ideal For: Small booths without access to electrical outlets.
- Examples: Clip-on lights, LED strips, or puck lights.
String Lights
- Benefits: Adds charm and creates a cozy, inviting atmosphere.
- Ideal For: Booths showcasing handmade goods like crafts, textiles, or candles.
Spotlights and Clamp Lights
- Benefits: Focus attention on specific products or display areas.
- Ideal For: Highlighting premium items or new arrivals.
3. Lighting Placement Strategies
Positioning your lights strategically ensures every part of your booth looks its best:
- Overhead Lighting: Use clip-on or hanging lights to illuminate your entire booth.
- Product Spotlights: Place small spotlights above or beside featured items to draw attention.
- Under-Shelf Lights: Add LED strips under shelves to highlight products on lower levels.
| Placement Type | Lighting Tools | Purpose |
| Overhead Lighting | Clip-on LED lights | General booth illumination |
| Product Spotlights | Adjustable clamp lights | Focus on featured items |
| Under-Shelf Lights | LED strips or puck lights | Illuminate lower-level displays |
5. Pro Tips for Craft Fair Lighting
- Test Before the Event: Set up your booth and test your lighting at home to ensure everything works as planned.
- Bring Extra Batteries: Avoid interruptions by packing spare batteries or portable chargers.
- Use Non-Reflective Surfaces: Prevent glare by avoiding overly shiny display props.
By using the right lighting tools and strategies, you can create a booth that not only attracts attention but also makes your products shine—literally. Great lighting isn’t just an extra touch; it’s a game-changer for craft fair success!
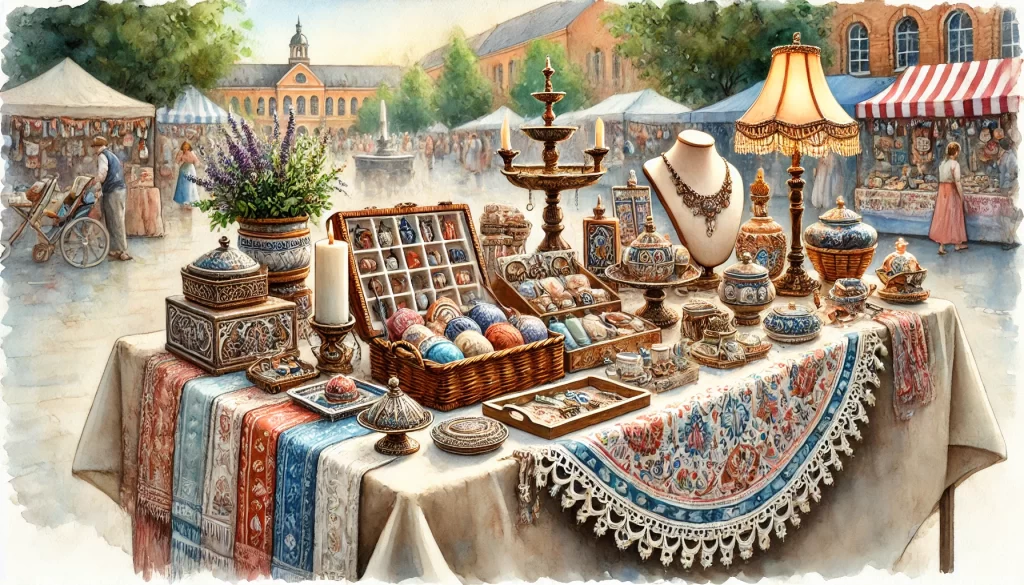
Displays and Props for a Personalized Touch
Your booth should feel like an extension of your brand—unique, inviting, and memorable. Displays and props allow you to create a personalized setup that showcases your creativity while making your products irresistible to customers.
1. Why Personalized Displays Matter
- Creates Emotional Connections: Thoughtful, creative displays draw customers in and make them more likely to buy.
- Highlights Product Features: Props can help emphasize the functionality or aesthetic of your items.
- Reinforces Branding: A cohesive theme ensures customers remember your booth long after the craft fair ends.
2. Using Vintage Props or Custom-Made Stands
- Vintage Props: Add charm and character to your booth. For example, old suitcases, wooden crates, or antique picture frames can double as displays.
Custom-Made Stands: Create a professional look by designing stands that fit your products perfectly, such as handmade wooden racks or painted pegboards.
Examples of Vintage Props:
| Prop Type | Suggested Use |
| Wooden Crates | Stackable shelves for small items like candles |
| Vintage Suitcases | Display textiles or jewelry inside the lid |
| Antique Picture Frames | Showcase product photos or pricing information |
3. Arranging Products for Interaction
Encourage customers to engage with your products by creating displays that are interactive and accessible.
- Touch-Friendly Displays: Use open baskets or trays for small items like soaps or ornaments.
- Thematic Groupings: Arrange items in sets or collections (e.g., seasonal themes or color palettes).
- Demo Zones: Set up a small area where customers can see or try your products (e.g., sampling lotions or testing pens).
4. Balancing Aesthetics and Practicality
While creativity is important, your craft market table display should still be functional and easy to manage.
- Avoid Clutter: Too many props can overwhelm customers. Keep the focus on your products.
- Portable and Durable Materials: Choose lightweight but sturdy props that can withstand transport and frequent use.
- Easy Setup: Test your displays at home to ensure quick assembly during the event.
Quick Tips for Balanced Displays:
- Use tiers or levels to avoid a flat layout.
- Place your best-selling items at eye level.
- Add pops of color with props like flowers, fabric, or signage.
5. Inspiring Display Ideas
Here are some creative ideas to inspire your booth design:
- Rustic Chic: Use burlap tablecloths, wooden crates, and mason jars to create a cozy vibe.
- Modern Minimalist: Focus on clean lines, neutral tones, and sleek metal stands.
- Nature-Inspired: Incorporate greenery, stone slabs, or driftwood to enhance handmade or eco-friendly products.
| Booth Theme | Key Elements | Ideal For |
| Rustic Chic | Wooden crates, burlap, vintage suitcases | Candles, textiles, soaps |
| Modern Minimalist | Metal racks, neutral colors, clean lines | Jewelry, tech accessories |
| Nature-Inspired | Greenery, stones, natural wood props | Eco-friendly products |
6. Pro Tips for Using Props
- Keep It On-Brand: Make sure every prop aligns with your brand’s identity and aesthetic.
- Use Props Strategically: Props should enhance your display, not overshadow your products.
- Plan for Versatility: Use multi-functional props that can adapt to different booth setups.
By incorporating unique displays and thoughtful props, you can create a booth that truly stands out. When customers feel connected to your setup, they’re more likely to stop, explore, and make a purchase.
Portable Storage and Organization Solutions
A well-organized craft market table display not only looks professional but also makes your job as a vendor much easier. Portable storage and organization solutions are essential for managing your inventory, streamlining setup, and maintaining a tidy display throughout the event.
1. Why Storage Matters for Vendors
- Easy Access to Inventory: Quickly restock items without disrupting the display.
- Saves Setup Time: Keeps everything neatly packed and ready to go for future events.
- Prevents Clutter: Ensures extra inventory and supplies are hidden but accessible.
2. Types of Portable Storage Solutions
Invest in portable, durable storage options to keep your inventory secure and organized:
Rolling Carts
- Equipped with wheels for easy transport.
- Ideal for carrying heavy items like bulk inventory or tools.
- Look for carts with multiple shelves or compartments.
Plastic Storage Bins
- Affordable, stackable, and weather-resistant.
- Perfect for storing smaller items like extra product packaging or backup stock.
- Use transparent bins for quick identification of contents.
Folding Crates
- Lightweight and collapsible for easy transport.
- Great for transporting medium-sized products or display props.
Soft Storage Bags
- Suitable for textiles, tablecloths, or fragile items that need padding.
- Choose bags with compartments to keep items separated.
| Storage Solution | Benefits | Ideal For |
| Rolling Carts | Portable, multi-functional | Heavy inventory, tools |
| Plastic Storage Bins | Weather-resistant, stackable | Small items, extra stock |
| Folding Crates | Collapsible, lightweight | Medium-sized props |
| Soft Storage Bags | Protective, padded | Textiles, fragile item |
3. Strategies for Quick Setup and Breakdown
An efficient setup saves you time and energy, especially when fairs are back-to-back:
- Label Everything: Use labels or color-coded tape to identify contents in bins or crates.
- Pre-Pack by Category: Group similar items together (e.g., display props in one bin, extra stock in another).
- Use a Checklist: Create a packing checklist to ensure nothing is forgotten.
Packing Checklist Example:
- Inventory (grouped by product type)
- Display props and signage
- Tablecloths and booth decor
- Lighting equipment
- Tools (tape, scissors, zip ties)
4. Organization Tips for During the Event
- Keep Restock Items Hidden: Store extra inventory under tables or behind shelves to keep your booth tidy.
- Use Storage Furniture: Incorporate rolling carts or crates as part of your display to save space.
- Have a Cash/Payment Station: Use a small storage box or drawer for cash, receipts, and card readers.
5. Labeling Hacks for Better Organization
- Use removable labels or chalkboard tags to identify items in storage bins.
- Add QR codes linked to an inventory list for quick product lookup.
- Include visual labels (e.g., icons or pictures) for easy identification during setup.
6. Pro Tips for Portable Storage
- Invest in Quality: Choose durable materials that can handle frequent use.
- Plan for Growth: Use storage options that accommodate future inventory expansion.
- Stay Flexible: Keep storage solutions adaptable for different booth layouts.
By staying organized with portable storage solutions, you’ll spend less time hunting for items and more time focusing on your customers. A tidy booth is not only easier to manage but also more appealing to potential buyers!
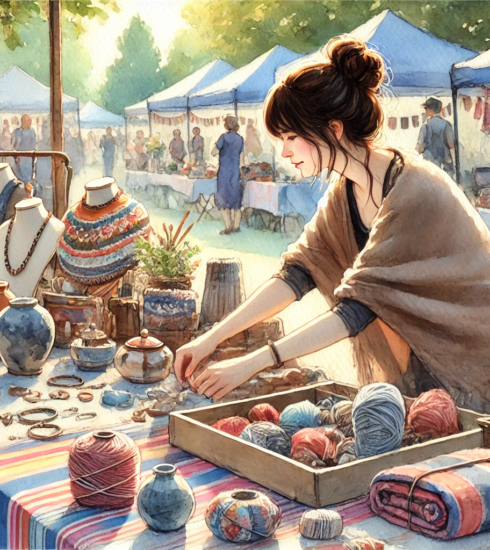
Comfort and Practicality for Vendors
Craft fairs often involve long hours of standing, interacting with customers, and managing your booth. Ensuring your own comfort and practicality can make a big difference in your energy levels and overall experience. This section covers essential tips and equipment to keep you comfortable and prepared throughout the event.
1. Comfortable Seating Options
Even the busiest vendors need to rest! A reliable, portable chair is essential for those moments when foot traffic slows.
Recommended Seating:
- Folding Chairs: Lightweight and compact, easy to carry to events.
- Padded Chairs: Add cushions or padding for extra comfort.
Stools with Backrests: Provide support while allowing for better visibility and interaction with customers.
| Chair Type | Features | Ideal For |
| Folding Chair | Portable, basic comfort | Budget-conscious vendors |
| Padded Chair | Extra cushioning for longer events | All-day fairs |
| Stool with Backrest | Compact, ergonomic, better visibility | Interactive booths |
2. Weather Protection for Outdoor Events
Outdoor craft fairs can be unpredictable. Being prepared for weather changes ensures you and your products stay protected:
- Portable Canopies: Lightweight, collapsible tents to shield you from sun and rain.
- Weights for Canopies: Prevent tipping in windy conditions.
- Portable Fans or Heaters: Battery-operated fans for summer or small heaters for chilly fairs.
3. Snacks, Water, and Break Essentials
Long events require energy, and keeping snacks and water on hand is a lifesaver:
- Non-Perishable Snacks: Granola bars, trail mix, or dried fruit for quick energy boosts.
- Reusable Water Bottles: Stay hydrated without generating waste.
- Cooler Bags: Store perishable snacks or drinks during summer fairs.
Vendor Break Checklist:
- Snacks and drinks
- Hand sanitizer and wipes
- Notebook or phone for jotting down ideas during quiet periods
4. Organizing Personal Essentials
Keep your personal items organized and within reach while managing your booth:
- Fanny Packs or Crossbody Bags: Keep cash, keys, and phones secure.
- Small Storage Boxes: Use these for personal items like sunglasses, chargers, or first aid kits.
- Portable Power Banks: Charge your devices on the go, especially for card readers or phones.
5. Vendor-Friendly Clothing
Wear practical, weather-appropriate clothing that’s both comfortable and professional:
- Layered Outfits: Adapt to changing temperatures throughout the day.
- Supportive Footwear: Invest in comfortable shoes for long hours of standing.
- Aprons or Utility Vests: Keep tools like scissors, pens, and notepads handy.
6. Pro Tips for Staying Comfortable
- Schedule Breaks: If possible, partner with another vendor or bring an assistant to cover your booth while you take a break.
- Stretch Regularly: Take a moment to stretch and relax your muscles during slow periods.
- Stay Positive: A comfortable, energized vendor creates a welcoming atmosphere for customers.
By prioritizing your comfort and practicality, you’ll be better equipped to focus on what matters most: connecting with customers and showcasing your amazing products. After all, a happy vendor is a successful vendor!
Checklist: Your Craft Fair Essentials
Preparation is the key to a successful craft fair experience. This comprehensive checklist ensures you have everything you need for a smooth setup, an engaging booth, and a stress-free event. Whether you’re a first-time vendor or a seasoned pro, this guide covers all the essentials.
1. Booth Setup Essentials
These items are the foundation of your craft fair display:
- Tables (foldable and lightweight)
- Table covers (neutral or brand-aligned colors)
- Shelves, racks, or display stands
- Signage (booth sign, product labels, banners)
- Lighting (LED lights, spotlights, string lights)
- Weights or clips for securing tablecloths and canopies
2. Inventory and Product Display
Ensure you’re ready to showcase and sell your products:
- Organized inventory (pre-labeled and categorized)
- Price tags or labels for all items
- Sample or demo items (if applicable)
- Props for personalized displays (crates, baskets, risers)
3. Payment and Sales Tools
Make transactions easy for your customers:
- Cash box or money pouch (with small bills and coins for change)
- Mobile card reader (e.g., Square, PayPal Here)
- Notebook or inventory tracker for sales
- Receipts (digital or paper)
4. Comfort and Personal Items
Keep yourself energized and comfortable during the event:
- Comfortable chair or stool
- Water bottle and snacks
- Weather-appropriate clothing (layers, hats, gloves, etc.)
- Portable fan or heater (for outdoor fairs)
- Sunscreen and bug spray (for summer fairs)
5. Emergency and Backup Supplies
Be ready for unexpected situations with these essentials:
- Tape (duct, masking, or clear)
- Scissors and zip ties
- First aid kit
- Extra batteries or portable chargers
- Trash bags and cleaning wipes
- Sewing kit or glue (for quick product repairs)
6. Promotional Materials
Leave a lasting impression with your customers:
- Business cards
- Flyers or brochures
- QR codes linking to your website or social media
- Branded giveaways (stickers, buttons, etc.)
By keeping this checklist handy, you’ll be well-prepared for every craft fair, ensuring both you and your customers have a positive experience.
Conclusion
Craft fairs offer a unique opportunity to showcase your creativity, connect with customers, and grow your brand. However, a successful event requires preparation, thoughtful booth design, and the right equipment. By following this guide, you’ll have everything you need to create a professional, inviting display that highlights your products and sets you apart from the competition.
Key Takeaways
- A well-organized booth with sturdy tables, creative displays, and effective lighting ensures your products stand out.
- Don’t overlook the importance of branding and signage—they create trust and leave a lasting impression.
- Prepare for every scenario with portable storage, emergency supplies, and a clear plan for setup and breakdown.
- Keep yourself comfortable and energized with practical items like seating, snacks, and weather protection.
Call to Action
Now that you’re equipped with a complete checklist, it’s time to put your plan into action. Gather your materials, practice your setup, and head into your next craft fair with confidence. Remember, preparation is the key to success—and with this guide, you’re already one step ahead.
