-
By

- January 20, 2025
- Booth Design & Layout
Craft Show Lighting Guide: Highlight Your Products for Success
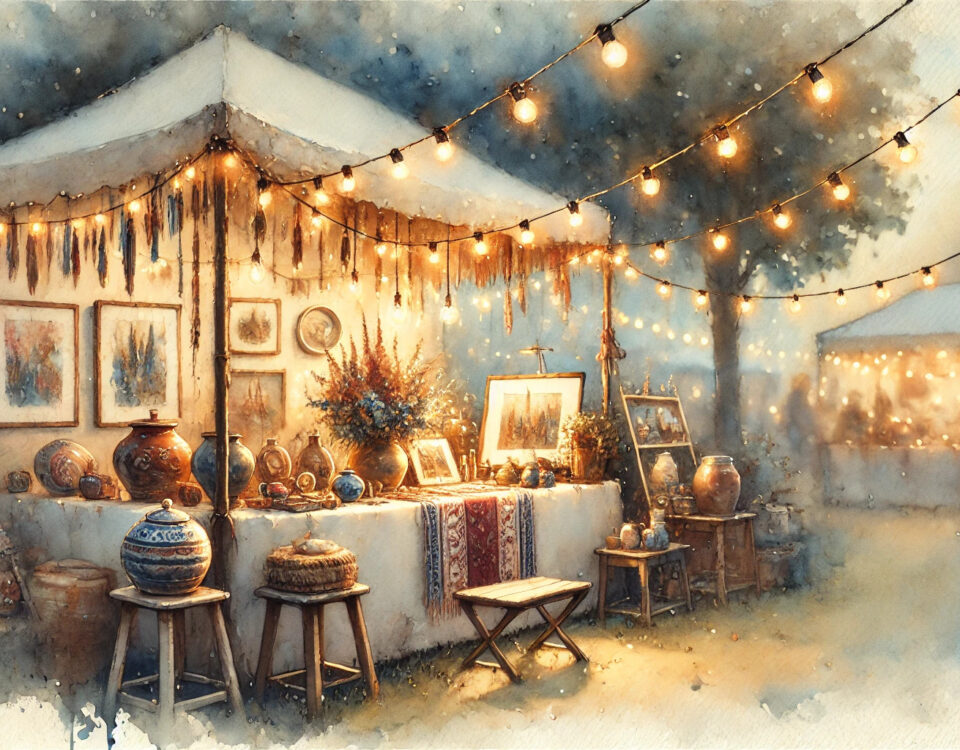
The craft show lighting can make or break your craft fair booth! Imagine walking through a bustling craft fair and being drawn to a booth that sparkles with well-lit, eye-catching displays. That could be your booth! In this guide, we’ll explore how to use lighting to make your products stand out, attract more customers, and drive sales. Whether you’re showcasing handmade jewelry, colorful artwork, or unique home decor, lighting is your secret weapon for success.
Why Lighting Matters for Craft Fairs
When it comes to putting together a booth at a craft fair, that really stands out and ‘POPS!’, craft show lighting is one of the most overlooked yet powerful tools at your disposal. Proper lighting can transform your booth from unremarkable to unforgettable, attracting customers and showcasing your products in the best possible light—literally!
The Psychology of Lighting
What I found quite interesting, when looking into the effects of proper lighting myself, is that lighting can play a critical role in customer behavior? Studies show that well-lit spaces are more inviting and can increase browsing time, leading to higher chances of making a sale. Warm, inviting lighting makes customers feel comfortable, while spotlighting your products draws their attention to key items. Which makes sense. It’s like going to watch a play and the spotlight shining brightly on a cast member instantly drawing your attention to them. The same goes for highlighting products.
How Lighting Enhances Your Products
Good craft show lighting doesn’t just illuminate your booth; it also:
- Highlights Details: Let your craftsmanship shine by showcasing intricate details, textures, and colors.
- Creates Atmosphere: A well-lit booth feels professional and sets the tone for your brand.
- Draws the Eye: Proper lighting naturally guides customer attention to featured products.
Here’s a comparison of booths with and without strategic lighting:
| Booth Setup | Effect |
| Dim, uneven lighting | Products appear dull; fewer customers stop by. |
| Well-lit with warm tones | Products pop with vibrancy, and the booth attracts more foot traffic. |
| Spotlight on key items | Focuses attention on high-value or unique products, encouraging purchase consideration. |
Real-Life Examples of Craft Show Lighting Success
Imagine a jewelry booth at a craft fair. Under dim lighting, the pieces look lackluster, and the sparkle of gemstones is lost. However, when LED spotlights are directed onto the jewelry, the stones shimmer and catch the eye of passersby, instantly increasing interest.
By understanding the importance of craft show lighting, you’re setting the stage for a booth that not only grabs attention but also, ‘fingers crossed!’ converts visitors into buyers!
Types of Lighting to Consider for Craft Fairs
Choosing the right craft show lighting for your craft fair booth is essential to creating a visually appealing and professional display. Here is a snapshot of different types of lighting options, their benefits, and how they can be used to enhance your setup.
1. LED Lights
LED lights are a top choice for craft fair vendors due to their energy efficiency and versatility.
- Advantages:
- Low energy consumption
- Bright and consistent light output
- Available in various colors and temperatures
- Best For: Highlighting specific products or providing even illumination across your booth.
2. Spotlights
Spotlights are ideal for drawing attention to high-value or unique items in your booth.
- Advantages:
- Creates focused lighting for featured products
- Adds depth and drama to your display
- Best For: Jewelry, artwork, or centerpiece items that require extra emphasis.
| Spotlight Tip | Use adjustable spotlights to change focus as needed throughout the event. |
3. String Lights
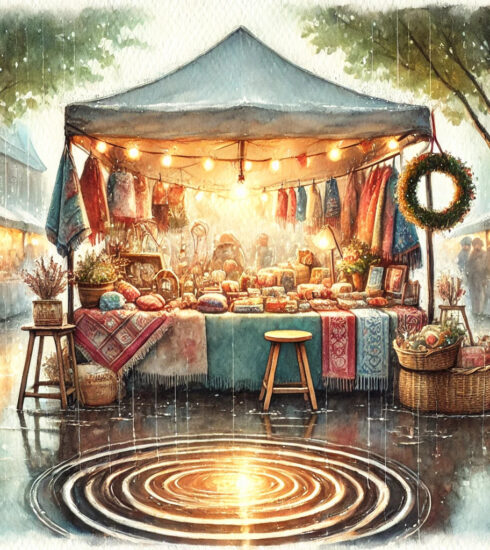
String lights add a touch of charm and warmth to your booth, making it feel cozy and inviting.
- Advantages:
- Easy to set up
- Creates an ambient, decorative vibe
- Works well for both indoor and outdoor settings
- Best For: Adding atmosphere and decorating booth edges or backgrounds.
4. Clip-On Lights
Clip-on lights offer a portable, flexible solution for lighting tricky areas.
- Advantages:
- Compact and lightweight
- Easy to reposition during the event
- Best For: Small booths or adding light to hard-to-reach corners.
5. Portable Ring Lights
Ring lights are perfect for vendors selling small, intricate items like jewelry or cosmetics.
- Advantages:
- Provides uniform lighting without harsh shadows
- Compact and often battery-operated
Best For: Creating a professional look for close-up displays.
Comparison of Lighting Options
| Lighting Type | Cost | Ease of Use | Best For |
| LED Lights | $$ | Easy | General booth lighting |
| Spotlights | $$$ | Moderate | Highlighting premium products |
| String Lights | $ | Very Easy | Decorative and ambient lighting |
| Clip-On Lights | $$ | Easy | Flexible lighting for small areas |
| Portable Ring Lights | $$ | Very Easy | Small product displays with fine details |
Pros and Cons of Each Lighting Type
| Lighting Type | Pros | Cons |
| LED Lights | Energy-efficient, versatile, long-lasting | Initial cost may be higher than other options |
| Spotlights | Focused lighting, adds depth to displays | Requires careful placement |
| String Lights | Affordable, decorative, easy to set up | Limited brightness for detailed products |
| Clip On Lights | Portable, flexible, adjustable | May require multiple units for full coverage |
| Portable Ring Lights | Professional-grade lighting, great for details | Small coverage area |
Choosing the right combination of these lighting types will ensure your booth is both functional and visually appealing. Use LED lights for general illumination, spotlights to highlight key items, and string lights to create a welcoming atmosphere.
Choosing the Right Lighting for Your Products
Not all products benefit from the same type of lighting. Choosing the right lighting for your craft fair booth means understanding your product’s unique characteristics and how to showcase them effectively. Below, I’ve put together a short reference guide that will assist you with matching lighting to your products, enhancing their appearance, and avoiding some common mistakes.
Matching Lighting to Product Types
I have found that different products require different lighting techniques to bring out their best features:
- Jewelry and Accessories:
- Use LED spotlights to highlight sparkle and shine.
- Opt for cool white lighting to enhance the clarity of gemstones and metals.
- Paintings and Artwork:
- Use warm or neutral lighting to avoid color distortion.
- Position lights at an angle to minimize glare and reflections.
- Fabric or Textiles:
- Use diffused lighting (e.g., ring lights) to soften shadows and enhance texture.
- Food or Edible Items:
Use warm lighting to make food appear fresh and appetizing.
| Product Type | Recommended Lighting | Why It Works |
| Jewelry | LED spotlights, cool white light | Highlights sparkle and fine details |
| Artwork | Warm or neutral angled lighting | Preserves true colors and reduces glare |
| Fabric/Textiles | Diffused lighting | Softens shadows and emphasizes texture |
| Food/Edibles | Warm lighting | Enhances colors and creates a welcoming vibe |
Tips for Enhancing Product Appearance with Lighting

- Layer Your Lighting: Use a combination of ambient, accent, and task lighting to create depth.
- Ambient Lighting: General booth illumination.
- Accent Lighting: Spotlights or clip-ons for specific products.
- Task Lighting: Lights for functional areas, like your checkout station.
- Adjust Color Temperature:
- Warm Light (2700K-3000K): Ideal for cozy, inviting booths with food or fabric products.
- Neutral Light (3500K-4000K): Versatile for most product types.
- Cool Light (5000K-6500K): Best for jewelry or products requiring sharp, bright light.
- Experiment with Angles: Test different lighting angles to avoid harsh shadows or reflections.
Some Common Mistakes to Avoid
Even with good lighting choices, there are a few things to watch out for:
- Overlighting Your Booth: Too much light can create glare and overwhelm customers.
- Mismatched Color Temperatures: Mixing warm and cool lighting can make your booth look uncoordinated.
- Poorly Positioned Lights: Direct light at eye level can be blinding or distracting.
- Neglecting Product Shadows: Harsh shadows can obscure details and make products look unappealing.
Friendly Tip: Always test your lighting setup at home before heading to the craft fair. Take photos of your booth under different lighting conditions to see how it looks.
Lighting Optimization Checklist
Here’s a handy checklist to ensure your craft show lighting is on point:
- [ ] Chosen the appropriate lighting type for your products.
- [ ] Tested lighting angles to minimize shadows and glare.
- [ ] Adjusted color temperature to complement your product colors.
- [ ] Ensured lighting levels are bright but not overwhelming.
- [ ] Confirmed that all products are evenly illuminated.
Selecting and positioning the right lighting for your products can transform your craft fair booth into a professional, eye-catching display that’s both inviting and welcoming.
Setting Up Your Craft Show Lighting

So we’ve now settled on the perfect lighting for your products. Now it’s time to set them up. This next section will cover the tools and materials you’ll probably need, as well as how to test your setup before the event, and tips for optimizing lighting placement based on your booth layout.
Tools and Materials You’ll Need
To set up your craft fair lighting, gather these essentials:
- Lighting Fixtures: LED lights, spotlights, string lights, or clip-on lights.
- Power Sources: Battery packs, extension cords, or power strips.
- Lighting Mounts: Clamps, stands, or hooks for secure placement.
- Diffusers: Light diffusers or filters to soften shadows.
- Spare Bulbs or Batteries: Always have extras on hand in case of emergencies.
| Item | Purpose | Example |
| LED Lights | General illumination | Adjustable LED panels |
| Battery Packs | Portable power source | Rechargeable power banks |
| Lighting mounts | Secure light placement | Tripod stands or clamps |
| Diffusers | Softens and spreads light evenly | Fabric diffusers |
| Spare batteries | Backup power | AA/AAA rechargeable packs |
Testing Your Lighting Setup
Before the craft fair, take time to test your lighting setup:
- Simulate the Booth Environment:
- Set up your booth at home or in a similar space.
- Turn off surrounding lights to replicate the fair’s conditions.
- Check Product Illumination:
- Place products in their display positions.
- Ensure all items are evenly lit without harsh shadows.
- Take Photos:
- Capture photos of your booth under the lighting.
- Review the images to identify areas that need adjustment.
- Experiment with Angles:
- Adjust lighting angles and positions to highlight key products.
- Avoid lights that shine directly into customers’ eyes.
Placement Tips for Different Booth Layouts
Every booth is unique, but here are some general placement strategies to follow:
Linear Booth (One Open Side)
- Place spotlights near the front to draw attention to your display.
- Use string lights along the booth edges for an inviting look.
- Add task lighting for areas where you’ll interact with customers.
Corner Booth (Two Open Sides)
- Focus accent lighting on high-value items visible from both sides.
- Use LED panels to create consistent light coverage throughout the space.
- Position lights at varying heights to add depth.
Island Booth (Open on All Sides)
- Create a focal point in the center using ring lights or spotlights.
- Use ambient lighting around the booth’s perimeter to guide foot traffic inward.
Friendly Tips for Craft Fair Lighting Setup
- Use Reflective Surfaces: Add mirrors or metallic accents to amplify lighting effects.
- Optimize Height: Position lights slightly above eye level to avoid glare.
- Test in Different Conditions: If your craft fair is outdoors, test your setup in natural light.
Bonus Tip: Bring duct tape or cable ties to secure cords and prevent tripping hazards.
Setting up your craft fair lighting takes a bit of preparation, but the effort pays off when your booth becomes a glowing beacon that draws in customers and sets you apart from other neighboring booths.
Budget-Friendly Lighting Solutions
You don’t need to spend a fortune to make your craft fair booth shine. With a little creativity and resourcefulness, you can set up a stunning display without breaking the bank. Here are some more affordable options, DIY ideas, and where to find discounts on professional-grade lighting.
Affordable Lighting Options
Here are some cost-effective lighting solutions to consider:
- Battery-Powered LED Lights:
- Affordable and portable.
- Great for venues with limited power access.
- Clip-On Lights:
- Inexpensive and versatile.
- Easily attach to tables or booth structures.
- String Lights:
- Low-cost and decorative.
- Available in various styles and colors.
| Lighting Option | Average Cost | Best For |
| Battery-powered LED lights | $10-$20 | General illumination |
| Clip-on lights | $5-$15 each | Focused lighting for small areas |
| String lights | $10-$25 | Decorative booth ambiance |
DIY Lighting Ideas
For those on a tight budget (which is probably most of us, right?), creating your own lighting solutions is a great option. Here are some DIY ideas:
- Mason Jar Lights:
- Place battery-powered tea lights or LED string lights inside mason jars.
- Hang them around your booth for a rustic, charming look.
- Foil Reflectors:
- Use aluminum foil to create DIY reflectors for clip-on lights.
- This helps amplify light without extra fixtures.
- PVC Pipe Light Stands:
- Build lightweight and adjustable light stands using PVC pipes.
- Perfect for hanging string lights or small fixtures.
Friendly Tip: Use materials you already have at home to minimize costs further.
Renting vs. Buying Lighting Equipment
If you’re not ready to invest in lighting, renting can be a practical alternative:
| Option | Advantages | Disadvantages |
| Renting | Lower upfront cost, access to high-quality gear | Long-term costs may add up |
| Buying | Own the equipment, use it for multiple events | Higher initial investment |
Recommendation: Start with affordable purchases for smaller items (like clip-on lights) and consider renting larger equipment (like LED panels) for big events.
Where to Find Discounts on Craft Show Lighting
Save money by shopping strategically:
- Online Retailers:
- Websites like Amazon, eBay, and Walmart often have affordable lighting options.
- Look for bundles or bulk discounts.
- Local Thrift Stores:
- Check for gently used clip-on lights, desk lamps, or string lights.
- Craft Store Sales:
- Stores like Michaels or Joann Fabrics often run seasonal sales on decorative lighting.
- Facebook Marketplace or Craigslist:
- Find second-hand lighting equipment from local sellers at a fraction of the retail price.
- Coupons and Cashback Apps:
- Use apps like Honey or Rakuten to save on purchases.
Maximizing Your Budget
Here’s how to make the most of a small lighting budget:
- Prioritize must-have lights for essential illumination first.
- Use dual-purpose lighting (e.g., string lights that provide both decoration and light).
- Build up your lighting collection gradually over time.
Budget Craft Show Lighting Plan Example
Let’s assume you have a $50 budget. Here’s how you could allocate it:
| Item | Quantity | Estimated Cost | Purpose |
| String lights | 2 Sets | $20 | Decorative and ambient lighting |
| Clip-on LED lights | 2 Units | $20 | Focused lighting for products |
| Batteries | 1 Pack | $10 | Power for clip-on lights |
With these budget-friendly options, you can create a well-lit booth that attracts customers and highlights your products—all without spending a fortune and maximizing the money earned when selling your crafts!
Power Sources and Technical Considerations
One of the key challenges at craft fairs is ensuring that your lighting setup has a reliable power source. I mean, how many fairs have you been to where the space is in a high school gym? Or some other open area where power outlets are few and far between? Whether you’re indoors or outdoors, planning for power needs is crucial to avoid technical issues during the event. Here are some ideas that cover the best power options, safety tips, and how to manage power effectively in your booth.
Common Power Sources for Craft Show Lighting
1. Battery-Powered Lights
- Advantages:
- Portable and easy to use.
- No need to rely on venue-provided power.
- Perfect for outdoor fairs or booths with limited access to outlets.
- Tips:
- Choose rechargeable batteries to save costs.
- Bring extra battery packs for backup.
2. Extension Cords
- Advantages:
- Ideal for indoor events with access to outlets.
- Allows flexibility in light placement.
- Tips:
- Use heavy-duty cords rated for outdoor use if applicable.
- Secure cords to the floor with tape to prevent tripping hazards.
3. Power Strips
- Advantages:
- Provides multiple outlets for various lights.
- Built-in surge protection for sensitive equipment.
- Tips:
- Opt for power strips with long cords for easier placement.
4. Portable Generators
- Advantages:
- Reliable for outdoor events with no power access.
- Can power multiple devices simultaneously.
- Tips:
- Choose a quiet model to avoid disturbing customers.
| Power Source | Best For | Considerations |
| Battery-powered lights | Outdoor events, portability | Ensure batteries are fully charged |
| Extension cords | Indoor events with outlets | Watch for tripping hazards |
| Power strips | Multiple devices, surge safety | May require long extension cords |
| Portable generators | Remote or outdoor locations | Can be noisy; ensure fuel supply |
Preparing for Limited Power Access
Some craft fairs may have limited or no power outlets available. Here’s how to plan ahead:
- Check with the Venue:
- Ask about power availability before the event.
- Inquire about power fees or restrictions.
- Use Low-Power Devices:
- Choose LED lights that consume less energy.
- Avoid high-wattage lighting that drains batteries quickly.
- Bring Backup Power:
- Carry spare batteries or a portable power bank.
- If using a generator, ensure it has enough fuel for the entire event.
Safety Tips for Managing Power
Safety is critical when setting up electrical equipment in your booth. Follow these guidelines to avoid accidents:
- Secure Cables and Cords:
- Use duct tape or cable covers to prevent tripping hazards.
- Avoid Overloading Outlets:
- Do not plug too many devices into one power strip or outlet.
- Keep Electrical Equipment Dry:
- Protect outlets, cords, and lights from rain or spills.
- Inspect Equipment:
- Check for damaged cords or exposed wires before use.
- Use Surge Protectors:
- Protect your devices from power surges or fluctuations.
Quick Reference Table: Power Options and Uses
| Power Option | Use Case | Estimated Cost | Tips |
| Battery-powered lights | Outdoor fairs, portability | $20-$50 | Recharge before the event; bring spares |
| Extension cords | Indoor fairs, outlet access | $10-$30 | Use heavy-duty cords for safety |
| Power strips | Multiple devices, surge safety | $15-$40 | Choose models with surge protection |
| Portable generators | Remote fairs, outdoor setups | $200-$500+ | Opt for quiet models to reduce noise |
Planning for Success
- Test Everything Beforehand:
Set up your booth at home to ensure all devices work together seamlessly. - Pack Extras:
Always carry spare cords, batteries, and tape to handle unforeseen issues. - Plan Layout Around Power Sources:
Position your lights and devices near power outlets or arrange your booth to accommodate cord lengths.
By planning your power needs and following these safety tips, you’ll ensure that your booth runs smoothly and efficiently, leaving you free to focus on engaging with customers and making sales.
Additional Tips for Enhancing Your Craft Fair Booth
Lighting is just one piece of the puzzle when it comes to creating a craft fair booth that draws in customers and drives sales. Here are some additional tips and tricks to help take your booth’s appeal to the next level. From using reflective surfaces to creative seasonal lighting ideas, these small ‘embellishments’ will further help your booth stand out from the crowd.
1. Add Reflective Surfaces to Amplify Lighting
Reflective surfaces can enhance the effects of your lighting and make your booth feel brighter without adding more lights.
- Mirrors:
- Place small mirrors behind your products to reflect light and add depth to your display.
- Use decorative mirrors for a chic, upscale look.
- Metallic Accents:
- Incorporate metallic trays, stands, or display frames to bounce light around your booth.
- White Surfaces:
- Use white tablecloths or backdrops to maximize the diffusion of light.
| Reflective Item | Purpose | Example |
| Mirrors | Reflect light and add depth to displays | Decorative wall mirrors or table mirrors |
| Metallic accents | Add shine and sophistication | Gold or silver display stands |
| White surfaces | Brighten the space and diffuse light | White backdrops or tablecloths |
2. Use Lighting to Guide Attention
Smartly placed lighting can direct customers’ focus to key areas of your booth.
- Highlight Featured Products:
- Use spotlights or clip-on lights to draw attention to high-value items.
- Create Layers of Light:
- Combine ambient, accent, and task lighting to create visual interest.
- Illuminated Pathways:
- Use string lights to frame your booth or guide customers toward your display.
3. Seasonal Lighting Ideas
Tailoring your lighting to the season or holiday can create a memorable customer experience:
- Holiday Craft Fairs:
- Use warm string lights or LED candles to create a cozy, festive atmosphere.
- Add small fairy lights to your product displays for extra sparkle.
- Summer Fairs:
- Incorporate bright, colorful lights or lanterns to match the vibrant energy of the season.
| Season | Lighting Idea | Effect |
| Winter/Holiday | Warm string lights, LED candles | Cozy, festive ambiance |
| Summer | Bright, colorful LED lights | Fun and energetic atmosphere |
| Autumn | Orange or warm-toned string lights | Earthy, inviting vibe |
4. Showcase Products with Creative Lighting Displays
Unique lighting displays can help your booth stand out:
- Shadow Boxes:
- Create lighted shadow boxes to display small items like jewelry or ornaments.
- Lighted Backdrops:
- Use light curtains or illuminated panels as a backdrop for your booth.
- Glowing Shelves:
- Add LED strips under shelves to create a modern, glowing effect.
5. Small Details That Make a Big Impact
Sometimes, it’s the small touches that elevate your booth from good to great:
- Color-Coordinated Lights:
- Match your lighting colors to your brand theme or product palette.
- Interactive Lighting:
- Add touch-activated lights to encourage customer interaction.
- Mood Lighting:
- Use dimmable lights to adjust the ambiance based on the time of day or crowd size.
Lighting Enhancement Checklist
Here’s a quick checklist to ensure your lighting setup is both functional and visually impactful:
- [ ] Added reflective surfaces to amplify light.
- [ ] Highlighted featured products with spotlights.
- [ ] Incorporated seasonal or thematic lighting.
- [ ] Used unique lighting displays like shadow boxes or backlit shelves.
- [ ] Tested and adjusted lighting for the time of day.
Thoughtful lighting and design elements will not only attract more customers but also leave a lasting impression. By combining creativity with well-placed lighting, you’ll create a booth that stands out at any craft fair. And that’s HALF THE BATTLE!
Conclusion
Lighting can be a powerful addition to elevate your craft fair booth and showcase your products in the best possible way. From choosing the right lighting types to strategically placing them for maximum impact, a well-lit booth can draw in customers, highlight your products’ best features, and create a memorable shopping experience.
Key Takeaways
- Why Lighting Matters: Effective lighting attracts customers, highlights product details, and sets the tone for your booth.
- Types of Lighting: LED lights, string lights, spotlights, and clip-on lights offer versatile options for any craft fair setting.
- Choosing the Right Lighting: Match your lighting choices to your products, using techniques like layering and adjusting color temperatures.
- Setting Up for Success: Test your lighting setup before the event, plan for power needs, and optimize placement based on booth layout.
- Enhancing Your Booth: Use reflective surfaces, creative lighting displays, and seasonal themes to make your booth stand out.
Call to Action
Now that you’re equipped with the knowledge to light up your craft fair booth, it’s time to take action! Test your setup, gather your tools, and let your creativity shine. Whether you’re showcasing jewelry, art, or other handmade goods, the right lighting can transform your booth into a beacon that attracts attention and drives sales.
